GitLab
Configure GitLab OAuth with ngrok
The step-by-step instructions below follow GitLab's documentation on setting up OAuth 2.0 for a web application.
Create an Application
-
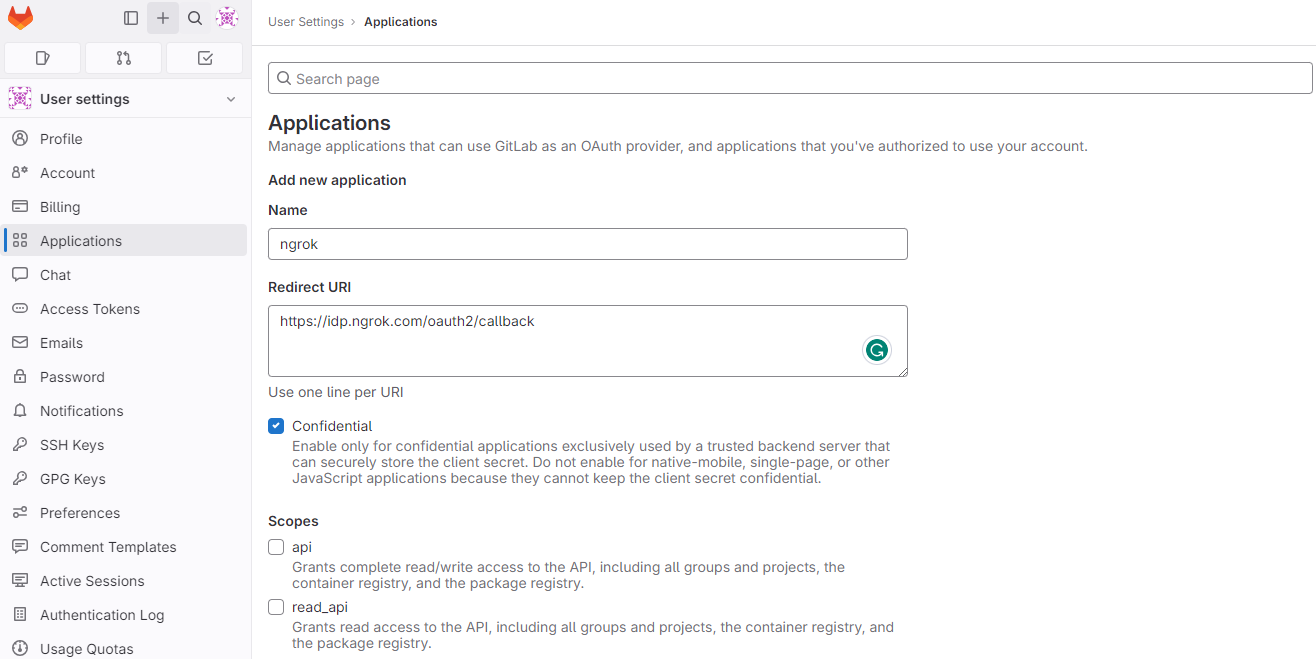
Access your GitLab profile page and select Applications on the left menu.
Note: If you want to restrict the list of users able to log in with GitLab, either create an application under one of your groups or an instance-wide application. See Additional application setup information.
-
Provide a Name for your application and enter
https://idp.ngrok.com/oauth2/callbackin the Redirect URI field.
-
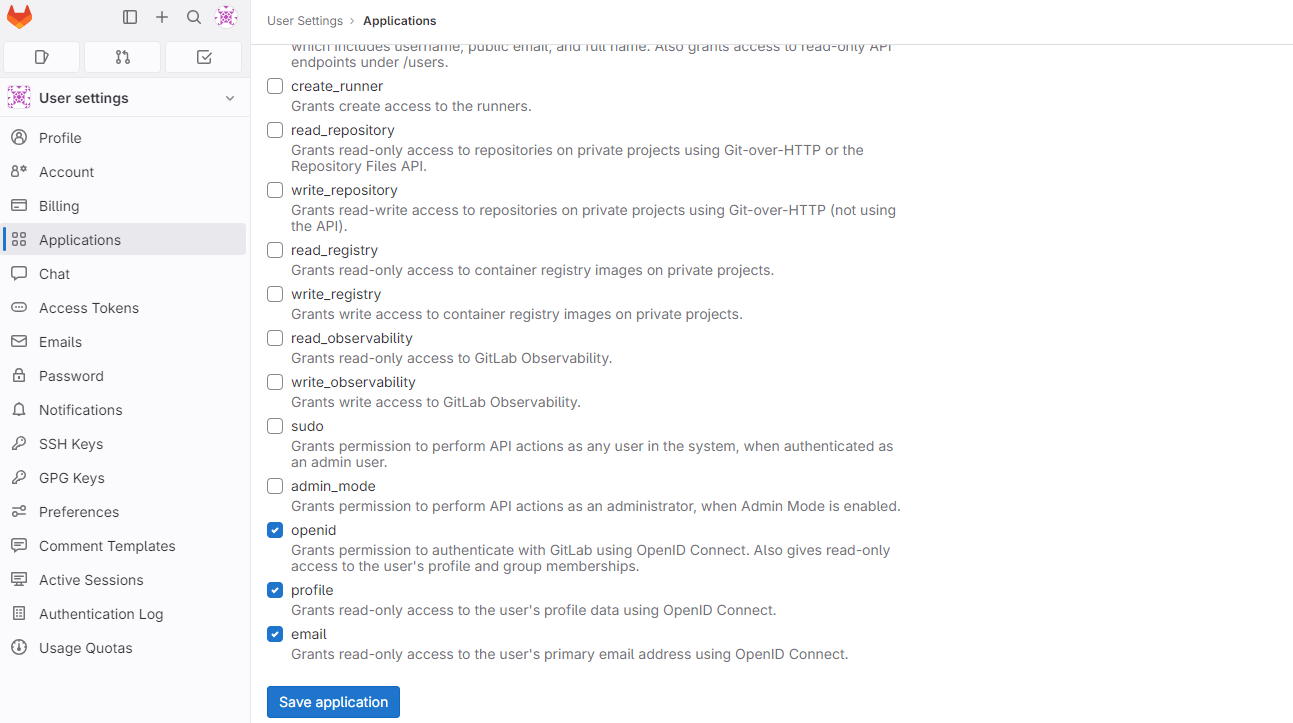
In the Scopes section, select all the fields appropriate for your app and then click Save application. In this example, mark the openid, profile, and email fields.

Update your ngrok endpoint traffic policy
- Access the ngrok Dashboard Endpoints page and locate an existing endpoint you'd like to add this to or create a new one.
- In your traffic policy, add the following configuration:
- YAML
- JSON
---
on_http_request:
  - actions:
      - type: oauth
        config:
          provider: gitlab
          client_id: "{your app's oauth client id}"
          client_secret: "{your app's oauth client secret}"
          scopes:
            - openid
            - profile
            - email
{
  "on_http_request": [
    {
      "actions": [
        {
          "type": "oauth",
          "config": {
            "provider": "gitlab",
            "client_id": "{your app's oauth client id}",
            "client_secret": "{your app's oauth client secret}",
            "scopes": [
              "openid",
              "profile",
              "email"
            ]
          }
        }
      ]
    }
  ]
}
- Click Save to validate and update your traffic policy.
Configure access control
Optionally, configure access control to your service by only allowing specific users or domains. For example:
- YAML
- JSON
# Only allow access to me@example.com. Add this after your OAuth Action.
---
on_http_request:
  - expressions:
      - "!(actions.ngrok.oauth.identity.email in ['me@example.com'])"
    actions:
      - type: deny
// Only allow access to me@example.com. Add this after your OAuth Action.
{
  "on_http_request": [
    {
      "expressions": [
        "!(actions.ngrok.oauth.identity.email in ['me@example.com'])"
      ],
      "actions": [
        {
          "type": "deny"
        }
      ]
    }
  ]
}