Facebook OAuth
Creating a custom Facebook application
Register an application
For additional assistance, see the Facebook app registration documentation.
- Visit the App Dashboard, log in, and convert your account into a developer account if necessary.
- Select "Add a New App" or "Create App."
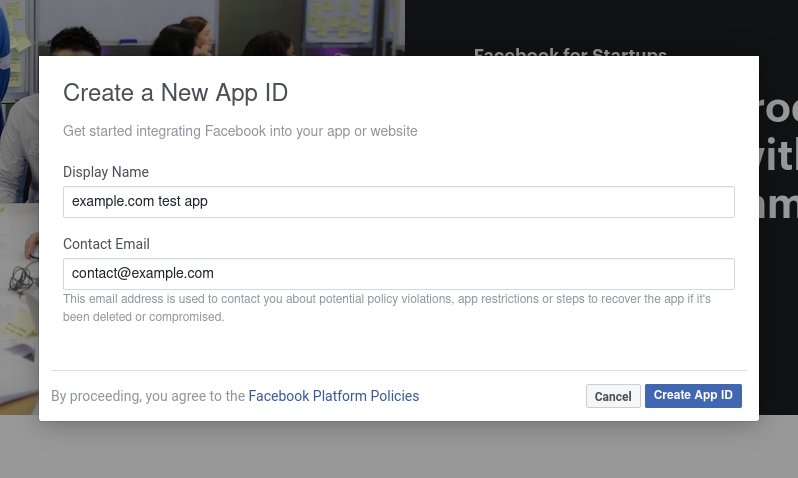
- Choose a user-visible name and contact email.
- Submit the form. A valid example app:
Configure your application
- After creation, you should see a list of products to add. If you don't, view your application from the dashboard and scroll down to "Add a product."
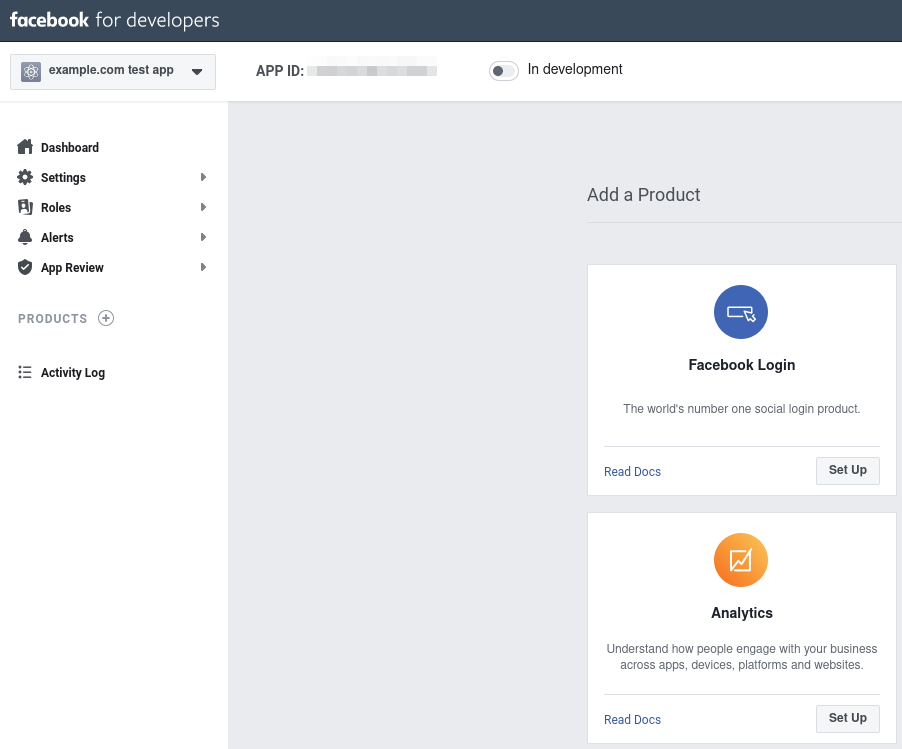
- Select "Set Up" for Facebook Login.
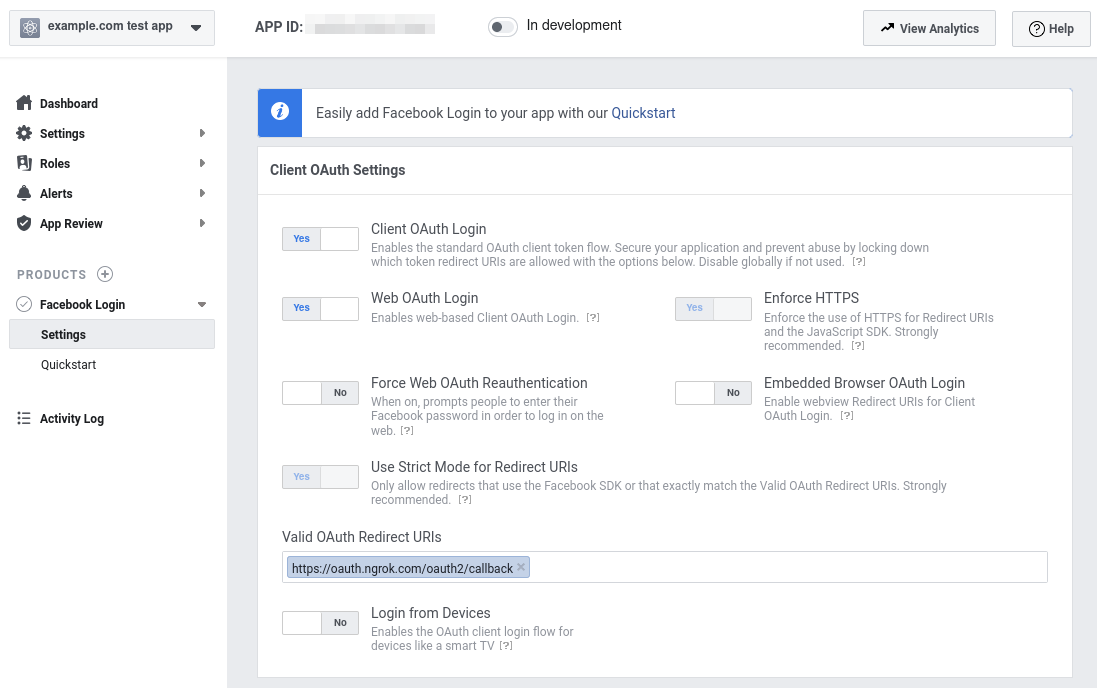
- On the left hand navigation, select Facebook Login then choose "Settings" below it.
- Add to "Valid OAuth Redirect URI"
https://idp.ngrok.com/oauth2/callback - Save the Facebook Login settings page. Final configuration should match:
- Select Settings on the left hand navigation, then choose advanced.
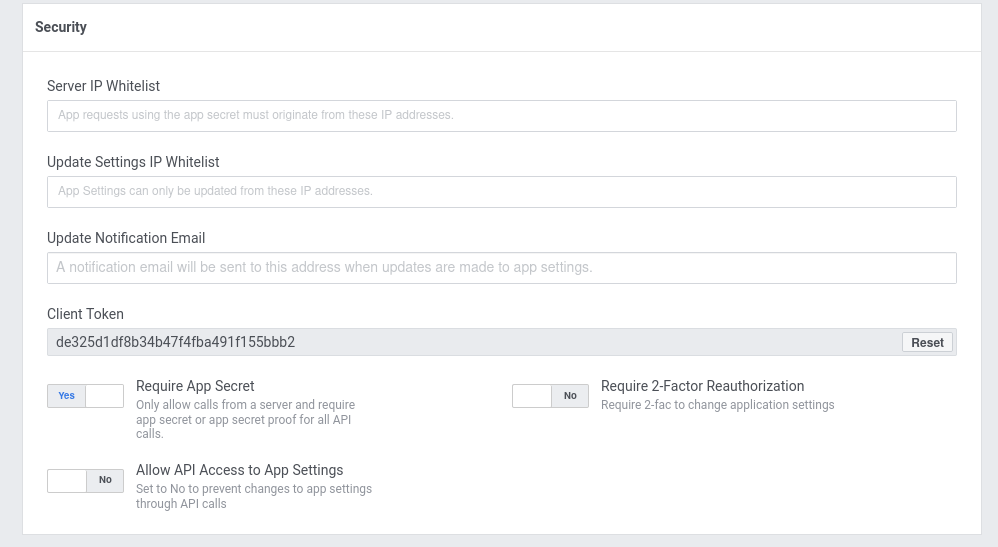
- Fill out additional settings for your application.
- ngrok does not support Server IP allowlisting.
- Enable "Require App Secret". See documentation for how to call Facebook Graph API with this feature.
- Save settings. A minimally complete security section of advanced settings:
- Visit basic settings on the left hand navigation.
- At the top, save your App ID and App Secret for later.
- Fill out the privacy policy URL. This URL must accessible when entered for verification.
- Select a category for your application.
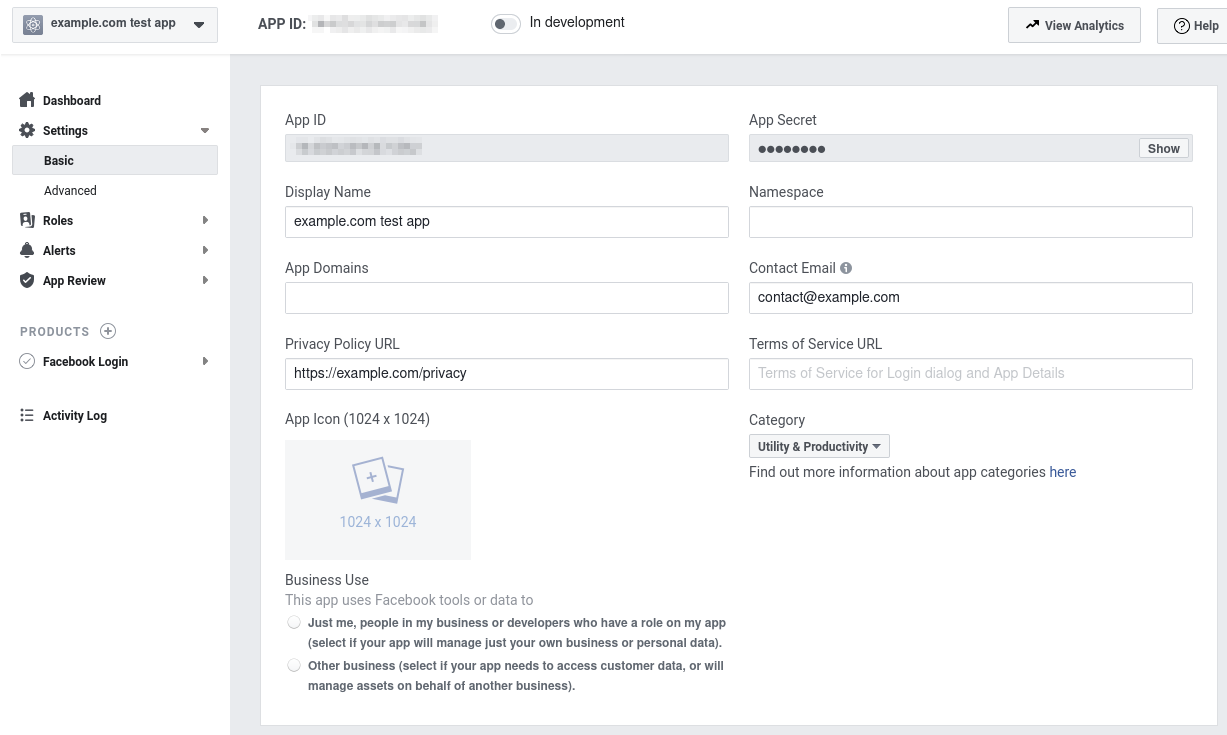
- Hit save changes. A minimally complete basic settings:
- Select the toggle for "In development" at the top of the page and confirm switching to live mode.
- Your application should now show as live:
Update your ngrok Endpoint Traffic Policy
- Access the ngrok Dashboard Endpoints page and locate an existing endpoint you'd like to add this to or create a new one.
- In your traffic policy, add the following configuration:
- YAML
- JSON
---
on_http_request:
  - actions:
      - type: oauth
        config:
          provider: facebook
          client_id: "{your app's oauth client id}"
          client_secret: "{your app's oauth client secret}"
          scopes:
            - email
{
  "on_http_request": [
    {
      "actions": [
        {
          "type": "oauth",
          "config": {
            "provider": "facebook",
            "client_id": "{your app's oauth client id}",
            "client_secret": "{your app's oauth client secret}",
            "scopes": [
              "email"
            ]
          }
        }
      ]
    }
  ]
}
note
You may add any scopes that are required by your application with the following caveats.
- Scopes which require a Facebook app review are unsupported.
- ngrok will enforce that users accept all permissions before completing authorization.
- Click Save to validate and update your traffic policy.
Configure access control
Optionally, configure access control to your service by only allowing specific users or domains. For example:
- YAML
- JSON
# Only allow access to me@example.com. Add this after your OAuth Action.
---
on_http_request:
  - expressions:
      - "!(actions.ngrok.oauth.identity.email in ['me@example.com'])"
    actions:
      - type: deny
// Only allow access to me@example.com. Add this after your OAuth Action.
{
  "on_http_request": [
    {
      "expressions": [
        "!(actions.ngrok.oauth.identity.email in ['me@example.com'])"
      ],
      "actions": [
        {
          "type": "deny"
        }
      ]
    }
  ]
}
Additional application setup information
User permission revocation
Facebook allows revocation of any permission as part of the authorization flow. ngrok will enforce that users initially grant all configured permissions. However, at any time after endpoint authorization, users may selectively revoke permissions. If your application requires more than the default or email scope, you must follow Facebook's rules for handling revoked permissions without violating terms of use.